Authentication is hard! Nowadays, to create a simple login or logout feature, we require a considerable amount of boilerplate code. Now picture we want to add authentication with Google or Facebook? More boilerplate, right? What if I told you that in React you can do that just by wrapping your code with a context provider and by using a custom react hook?
In this blog post, I'll show you how to add authentication to your React application using the Auth0 useAuth0 custom hook, how to display the authenticated user information, and how to authenticate with a social provider like GitHub.
Setup
Auth0 dashboard
So the first thing you need is an Auth0 account. You can sign up for free at auth0.com/signup.
Once you have your account setup, on the application settings dashboard create a new application with the Single Page Web Application type.
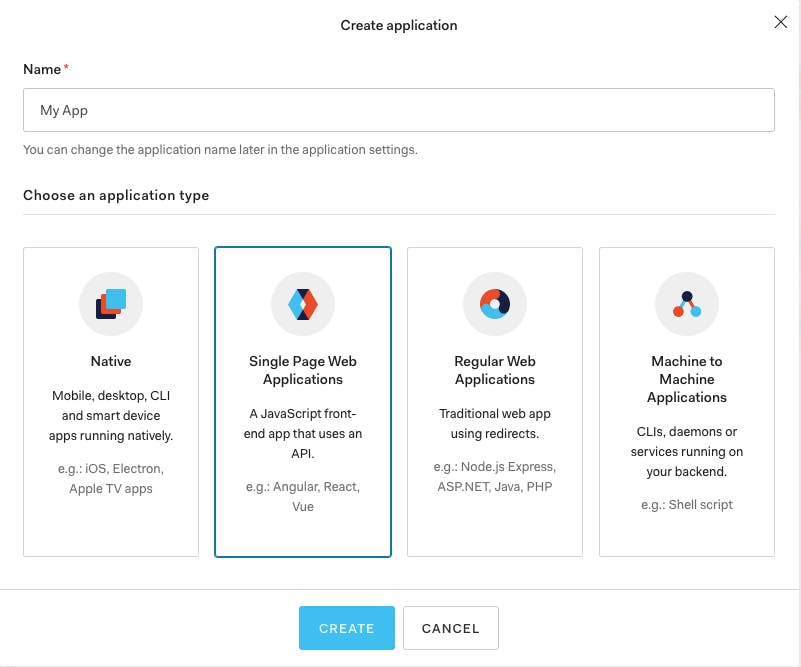
Now that you have your application, you will need to get some data and do some configurations first, here's what you need to do:
- Copy your Domain value (we'll use it in the next step)
- Copy your Client ID value (we'll use it in the next step)

- Add
http://localhost:3000to the Allowed Callback URLs so that it can call back to it after logging in - Add
http://localhost:3000to the Allowed Logout URLs so that it can redirect to it after logging out - Add
http://localhost:3000to the Allowed Web Origins to make it an allowed origin for use with Cross-Origin Authentication
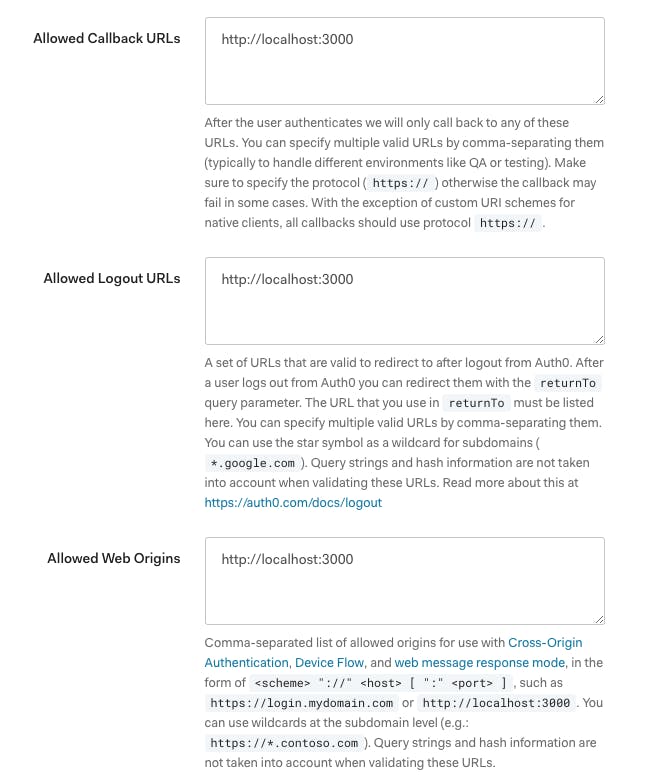
Now we configured everything on the dashboard, the next thing you will need is an application.
React Application
On this project you should do two things first:
1. Install auth0-react SDK
npm install @auth0/auth0-react
2. Add your previously copied domain and client id to your .env file
REACT_APP_AUTH0_DOMAIN=<Add your domain here>
REACT_APP_AUTH0_CLIENTID=<Add your client id here>
Now we finished all the setup needed to add authentication to our application. To be able to make use of the useAuth0 hook we need to wrap our application the Auth0 context provider.
Auth0Provider
import { Auth0Provider } from '@auth0/auth0-react'

ReactDOM.render(
  <Auth0Provider
    domain={process.env.REACT_APP_AUTH0_DOMAIN}
    clientId={process.env.REACT_APP_AUTH0_CLIENTID}
    redirectUri={window.location.origin}
  >
    <App />
  </Auth0Provider>,
  document.getElementById('root'),
)
On this snippet, we wrap our App component with the Auth0Provider which is a context provider that stores the authentication state of our users and allows for children of this component to access it.
This provider receives 3 parameters:
- the
domainandclientIdparams which we can get thanks to our setup on the .env file - the
redirectUriwhich is the default URL where Auth0 redirects the browser to with the authentication results. In the snippet above we use the origin property from the location object to get the current page URL
Having our App wrapped with the Auth0Provider, now we can start using the useAuth0 hook.
useAuth0
useAuth0 is a custom React hook that's part of the Auth0 React SDK. This hook provides you with some helpers and functions that you can use to abstract all the authentication logic and often immense boilerplate code from your code.
On the next sections, I'll present you to some auth methods for login (loginWithRedirect) and logout (logout) as well as some auth state for obtaining the authenticated state (isAuthenticated) and the authenticated user date (user).
Login
For adding the ability to login to your application, you can make use of the loginWithRedirect method.
import { useAuth0 } from '@auth0/auth0-react'

const LoginButton = () => {
  const { loginWithRedirect } = useAuth0()
  return <button onClick={() => loginWithRedirect()}>Log In</button>
}
Here we show our LoginButton component. In this component, we destructure the loginWithRedirect method from the useAuth0 hook and assign its call to the button onClick event. After pressing the button, you will be redirected to the Auth0 Universal Login page where the user can either sign in or sign up.
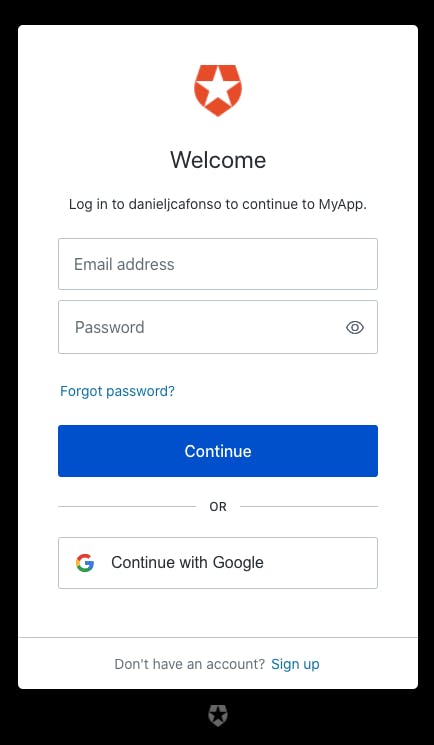
Note: if you want to avoid being redirected to a new page, you use instead the loginWithPopup method to open a popup with the Auth0 Universal Login page.
Logout
For adding the ability to log out to your application, you can make use the logout method
import { useAuth0 } from '@auth0/auth0-react'

const LogoutButton = () => {
  const { logout } = useAuth0()
  return (
    <button onClick={() => logout({ returnTo: window.location.origin })}>
      Log Out
    </button>
  )
}
Here we show our LogoutButton component. In this component, we destructure the logout method from the useAuth0 hook and assign its call to the button onClick event. This method receives a returnTo parameter where, thanks to the origin property from the location object, we specify the URL where Auth0 will redirect the browser after the logout process.
Authentication State: isAuthenticated and User
As mentioned above, besides the functions that you gain access thanks to the useAuth0 hook you also can access some authentication state properties like isAuthenticated and user
import { useAuth0 } from '@auth0/auth0-react'

const Profile = () => {
  const { user, isAuthenticated } = useAuth0()
  return (
    isAuthenticated && (
      <div>
        <img src={user.picture} alt={user.name} />
        <h2>{user.name}</h2>
      </div>
    )
  )
}
Using isAuthenticated and user properties to display authenticated user information
In the snippet above, by combining the isAuthenticated property with the user property we guarantee that we'll only display the user data once we're sure that the user is authenticated.
Bonus: Adding new social authentication within the Auth0 portal
By default on the Auth0 Universal Login page, you'll only be able to use Google as a Social Identity Provider. In this section, I'll show you how Auth0 makes it easy for you to add a new social provider to your application.
Step 1
On the application settings dashboard go to the social connections tab to see all the currently configured social connections you have. Click on the Create Connection button. (Click here to skip this and the previous step).

Step 2
Select one provider. In this example, I'll be choosing GitHub (Click here to skip this and the previous steps).
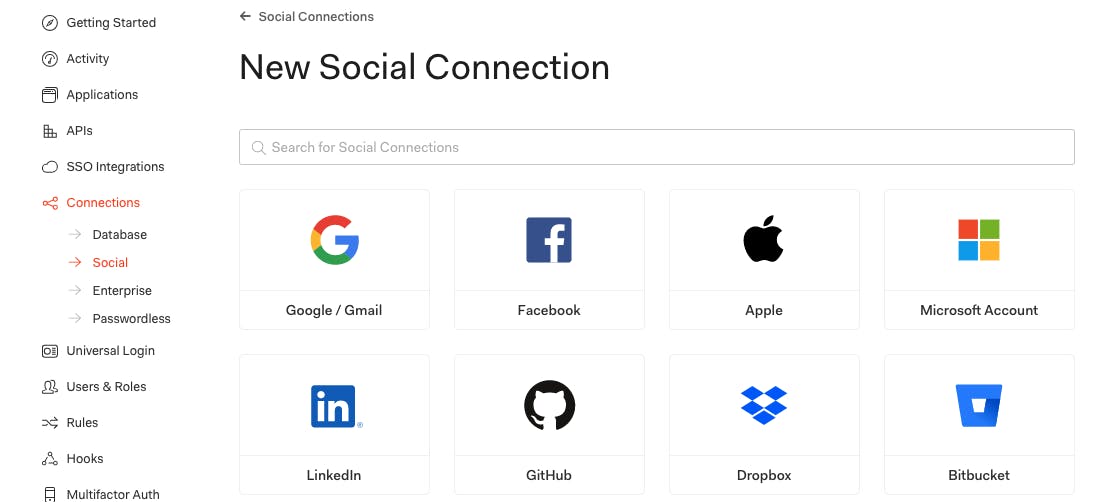
Step 3
Scroll down and click on the Create button.
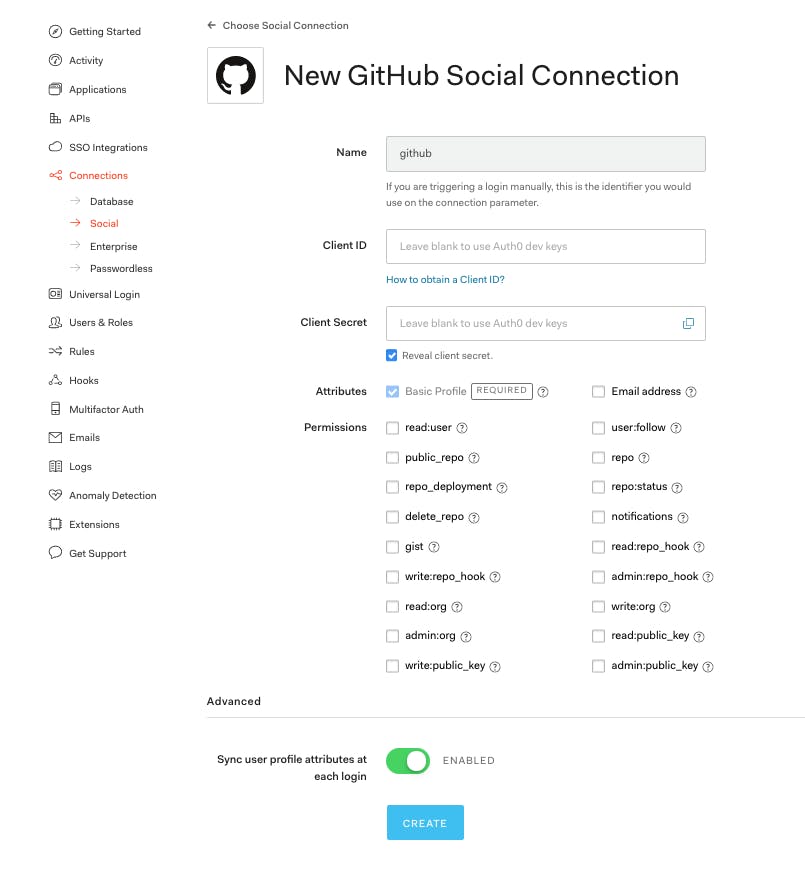
Step 4
You now can toggle this provider for your application.

Step 5
Try to log in on your application again.
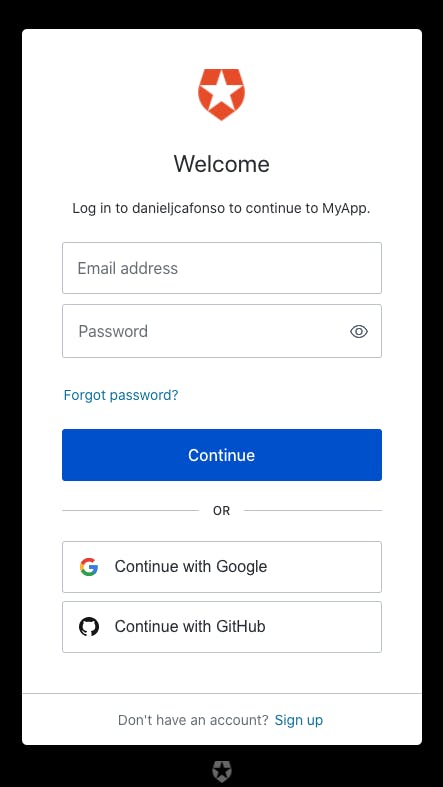
GitHub now shows up as an authentication option
TLDR
Just in case you want a quick summary of everything here it is:
- Create an Auth0 account at auth0.com/signup
- Get the Domain and Client ID from your application at manage.auth0.com/#/applications and add them to your application .env
- Configure your Allowed Callback URLs, in this case, add
http://localhost:3000 - Configure your Allowed Logout URLs, in this case, add
http://localhost:3000 - Configure your Allowed Web Origins, in this case, add
http://localhost:3000 - Install Auth0 React SDK
- Wrap your main component with the Auth0Provider and add the domain, client id, and redirectUri parameters to it.
- With the
useAuth0hook, destructure the login method (loginWithRedirect or loginWithPopup) and create a login component - With the
useAuth0hook, destructure the logout method and create a logout component - With the
useAuth0hook, destructure the isAuthenticated variable and user properties to access authentication state inside a component
What's next?
On the next posts of this series, I'll be showing you how to add protection to a route on your React application and how to use an Access Token to call a protected API.
Hope everyone enjoyed and stay tuned!
